Tuesday, May 24, 2011

QRcodes: PHP based QRcodes in the cloud

Following on from my Javascript based QRcodes in the cloud here

The same guy who wrote the javascript engine also has a PHP based generator released under the MIT license. The php code can be found here

So, with the help of phpform.org I have created my very own webpage on my very own free Amazon micro cloud.

The form looks like this,

As you may be able to tell I have further plans to use php and create a bigger and better site.

I created the above form with phpform.org and downloaded the code. I put all the code from phpform.org and http://www.d-project.com/ in one directory.

I then manually changed the submit action in form.html to call the adapted example qrcode php code.

Here is the adapted php code to generate the qrcode from the text in the form.
 <?php
  
 $bt = $_POST['element_1'];
  
 $ty = $_POST['element_2'];
  
 require_once("qrcode.php");
  
 $qr = new QRCode();
  
 $qr = QRCode::getMinimumQRCode( $bt , QR_ERROR_CORRECT_LEVEL_L);
  
 $qr->make();
  
 $qr->printHTML();
  
 ?>
  

And I added some google ads to the code and it looks like this.


Below is the live Amazon EC2 page. link here

Its my test Amazon server so the server may be shut down at any time.

Friday, May 20, 2011

QRcodes: Javascript based QRcodes in the cloud and an SAP BSP

Due to my involvement with the SAP mobile tagging wiki page.

I came accross the javascript based QRcode generator here.
The files to create QRcodes with Javascript can be downloaded from the above link.

Cloud Based Javascript QRcode

Only related to the cloud as I use my own free Amazon EC2 micro instance.

As I have access to my free Amazon micro instance in the cloud again, I put up the following simple webpage to generate a QRcode based on values in the URL. The following takes the parameter out of the URL and cuts the string after the 3rd character. Its my choice and there may be better ways of getting parameters with Javascript. If you know let me know :)


So a URL http://barcode.dyndns-web.com/qrcode.html?q=robert russell  would result in the following


The Javascript that creates the QRcode - qrcode.js and sample.js are uploaded to the same directory as the following webpage.

 <html>
  
 <head>
  
 </head>
  
 <body>
  
 <script type="text/javascript" src="qrcode.js"></script>
  
 <script type="text/javascript" src="sample.js"></script>
  
 <script type="text/javascript">
  
 var q = location.search;
  
 var c = (q.substring(3));
  
 draw_qrcode( c );
  
 document.write(c);
  
 </script>
  
 <p>
  
 QRcode
  
 </p>
  
 </body>
  
 </html>


SAP BSP Javascript based QRcode

Create a BSP (I called my BSP ZJQR) and upload the qrcode.js and sample.js to the MIME repository. Create a page called qr.htm as shown in the following screen shot. The "Q" page attribute needs the auto flag to be set


The code
 <%@page language="javascript" %>
  
 <script type="text/javascript" src="qrcode.js"></script>
  
 <script type="text/javascript" src="sample.js"></script>
  
 <script type="text/javascript">
  
 draw_qrcode("<%= q %>");
  
 </script>
  
 <%= q %>  


So the URL (changing the FQDN and port to the server as appropriate) would produce the following


http://F.Q.D.N:PORT/sap/bc/bsp/sap/zjqr/qr.htm?q=robert+russell


Tuesday, May 17, 2011

SAP: Using Lotus Notes 8 Livetext with SAP (example view transport logs)

We use standard CTS to mange our SAP transports and one thing that bugs me is checking the transport logs via logging on, running the transaction, enter transport number and see the results. When I started to use Lotus Notes 8 client I liked the livetext feature in linking key words to web pages. So I thought that there must be a quicker way to go to the transport logs using the livetext feature of Lotus Notes. After various attempts to use the standard HTML webgui for SAP I could not get the transaction to submit and display the transport logs. So using a BSP to form the URL here is a way to link to transport logs with Lotus Notes livetext. This post is not related to Alloy the IBM/SAP product for SAP and Notes integration, it takes advantage of the standard Notes 8 livetext feature by using a custom BSP in SAP. We do not use Alloy and I have no experience with that product.

This following is an example using transport logs although any transaction could be used with the right key words in livetext.

Also if you have Lotus Notes I am guessing you will also have a Notes application linked to SAP data. We do have a transport application in Notes that sends out emails during the phases of development, which we use for transport management and auditing purposes. The livetext feature helps when emails are sent via the application with the transport number. A way to view the transport log directly when clicking on the livetext activated transport number.

Screen shot of what I mean if you are not familiar with livetext. Note the blue underlined text in the email (the transport number) and the next tab is the log of the transport.

As the user is logged onto the HTML webgui then further actions/transactions can be performed.
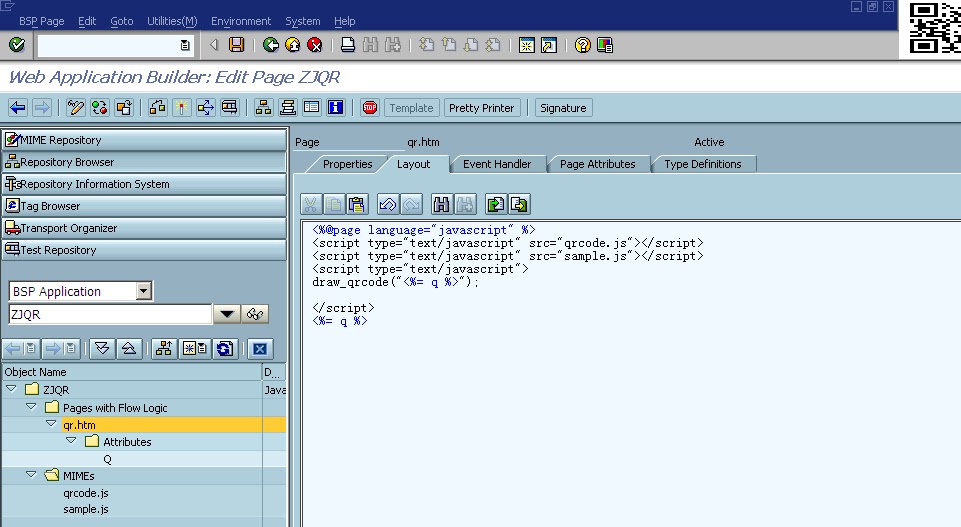
SAP BSP Setup


Transaction to display transport logs.

There is no standard direct transaction to display individual transport logs. However there is an ABAP report RDDPROTT which will display transport logs. So I created a SAP transaction called ZJWEBB to call the ABAP report. This then makes forming the URL that displays the transport logs easier.


BSP

BSP called ZBSPLN8, general layout is below.


General idea is that page "transport_lookup.htm" is the form where the transport number is entered.
This then calls page "transportresult.htm" which redirects to the html webgui to display the transport logs :)

Transport_lookup.htm

Layout   Simple form to use with livetext
 <%@page language="javascript"%>
  
 <html>
  
 <head>
  
   <form method="POST" action="transportresult.htm" target="_parent">
  
    <p> Transport No.:
  
     <input type="text" name="transport" >
  
    </p>
  
       <p>
  
     <input type="submit" value="Lookup Transport">
  
    </p>
  
   </form>  


OnInputProcessing  set the transport number to pass to the results page.

* event handler for checking and processing user input and
* for defining navigation
navigation->set_parameter( 'transport' ).

Attribute

transport TYPE STRING Transport number


Transportresult.htm  used to redirect to the HTML webgui

Layout This is only used for trouble shooting to display passed parameters. It can be ignored.

 <%@page language="abap"%>
  
 <html>
  
 <%= transport %>
  
 <%= short_text %>
  
 </html>


OnInitialization used to form URL with transaction ZJWEBB to display transport logs in the HTML webgui

 * event handler for data retrieval
  
 data: trans type str,
  
   url_ex type string,
  
 transport type e070-trkorr,
  
   li_cofi_lines TYPE TABLE OF tstrfcofil.
  
 trans = request->get_form_field( 'transport' ).
  
 select AS4TEXT from E07T into short_text where TRKORR EQ transport.
  
 endselect.
  
 concatenate 'http://F.Q.D.N:{port}/sap/bc/gui/sap/its/webgui?~okcode=*zjwebb+PV_KORR=' transport trans into url_ex.
  
 navigation->goto_page( url_ex ).
  

Change the F.Q.D.N and  {port} to the correct values for the installation.

Attributes

short_text TYPE STRING
transport TYPE STRING

"short_text" was used for testing and also the SQL in the OnInitialization using this attribute can be ignored.

SICF Changes to BSP Service  allow system logon page for the BSP and not the standard popup logon.


Select "System Logon" and save the change. This allows the livetext widget to use the logon page.

Test to confirm the BSP is working by entering a transport number into the transport_lookup page.


Lotus Notes 8 Client Livetext Setup

Select the getting started with widgets icon


Select Web Page and Next


Enter the URL to the BSP - changing the FQDN and port as required then Next


Select "1" on the form and DO NOT change the default user and password and select Next. The user Lotus and password IBM are used by the livetext widget. The actual logon credentials come next.


Create a new user account with the correct logon details and select Next


Select Next do not enter anything on this page as it is just a confirmation that the logon to the SAP server was successful.


Select "1" on the form and select Next


Enter a component name and select "wire as an action". Select the "transport" ID from the BSP form and select Next.

Select Tab to display the results. Click on the "new recognizer"


Select New Type


Enter the Name for the new content type and hit OK


Enter a regular expression for the transport number. Here ...K...... will match any 10 digit string with a capitol K as the 4th character.


Select Next and Finish to complete the livetext widget.

So now if the livetext feature is active in Lotus Notes, all emails containing a transport number should have a blue underline indicating that the transport logs can be viewed by clicking on the transport number. As shown earlier. As this example is based on transports the server created for the BSP is the

The live text activation can be found in the preferences for Notes.


Monday, May 16, 2011

SAP: Squeezing the world (google earth) into SAPGUI for Windows

Following up from the thematic mapping blogs related to thematic maps with KML polygons.

http://sap-in-japan.blogspot.com/2011/05/generating-kml-for-japan-or-any-country.html
http://sap-in-japan.blogspot.com/2011/01/sap-thematic-mapping-with-kml.html

Inspired by the thematic mapping engine in presenting data in KML, this time I cover scalable icons in KML with the google earth api plugin and also geocoding custumer postcodes then calling Google Earth via a browser function call.

Here is my YouTube video with the google earth plugin inside the SAPGUI for Windows. Only works with Windows sapgui due to the headless internet explorer required for the google earth api. The Java gui uses the ICE browser which is not compatible with the google earth api.

The video will change later as I am stuck with Windows Movie Maker as my MAC is back in Japan.

Thursday, May 5, 2011

Internet Explorer Accelerator to display a customer in SAP webgui (ES Workplace demo)

Using an Internet Explorer Accelerator in an SAP Webgui ALV grid

I do like IE8 accelerators and covered them before with a QRcode in an Internet explorer accelerator

The following demo is based on the ERP system that is part of the SAP Enterprise Services Workplace.
The ES workplace website can be found here
You need to register to get a logon account.

When you logon to the ERP system you are in the world of SAP, apart from ALV grids (maybe some other parts) which allows the IE8 accelerators when text is selected.

Using this method you can link transactions, so selecting some text will allow an URL to be constructed to start another transaction.

Onto the demo, using VA05N "sold to party" number to link to VD03 display customer transaction. Demonstrating a way to quickly display the customer name instead of just the number.

Running VA05n "List Sales Orders" will produce a list of customers as shown below.


Selecting the the text in one row for the "Sold-to pt" will display the blue IE8 accelerator button. As shown below.


When selecting my accelerator this will use the transaction VD03  to display the customer. As shown below the customer is "Becker Berlin". The screen shot shows the preview screen, when clicking on the "SAP display customer" accelerator then the VD03 transaction will start in a new page. It does start a new session.


I have put this accelerator on my Amazon EC2 micro instance here.


The code/xml behind the accelerator is here....

Webpage for the button.

  <button id="myButton"
  
 onclick="window.external.AddService('http://barcode.dyndns-web.com/ie8/vd03.xml')">
  
 Add Robert Russell's display customer accelerator for SAP's ERP ES Workplace</button>
  

XML for the accelerator.

 <?xml version="1.0" encoding="UTF-8"?>
  
 <openServiceDescription xmlns="http://www.microsoft.com/schemas/openservicedescription/1.0">
  
  <homepageUrl>https://erp.esworkplace.sap.com</homepageUrl>
  
  <display>
  
   <name>SAP display customer</name>
  
   <icon>http://barcode.dyndns-web.com/ie8/qr.ico</icon>
  
  </display>
  
  <activity category="SAP display customer">
  
   <activityAction context="selection">
  
    <preview action="https://erp.esworkplace.sap.com/sap/bc/gui/sap/its/webgui?">
  
     <parameter name="~okcode" value="*vd03 RF02D-KUNNR={selection}"/>
  
    </preview>
  
    <execute action="https://erp.esworkplace.sap.com/sap/bc/gui/sap/its/webgui?">
  
     <parameter name="~okcode" value="*vd03 RF02D-KUNNR={selection}"/>
  
    </execute>
  
   </activityAction>
  
  </activity>
  
 </openServiceDescription>
  

Wednesday, May 4, 2011

Generating KML for Japan (or any country) for thematic mapping from a Natural Earth shapefile

KML file of Japan prefectures

Raw KML file available to download for free and to be used in any way is here.


As some of my previous blogs have pointed out I am interested in the thematic mapping concept and using these methods in SAP and other applications with KML.

http://sap-in-japan.blogspot.com/2011/01/sap-thematic-mapping-with-kml.html

The blog above covers the "simple transformation" of data into a KML file. I used the Natural Earth datasets as a base to generate the KML for SAP.

I did have intentions to cover the method I used to generate the KML earlier but have been delayed by my work related activities and the fact I am not currently at my home in Japan.

However I have gone through the details now and here is ONE way to generate KML from the Natural Earth Datasets. (How to use this KML in SAP will follow in another blog)

*As another blog entry pointed out there are Google fusion tables generated over at the thematic mapping engine available online. When I commented on Mr Sandvik's blog he pointed out that the datasets can be used but also google terms of use are also referred to. I do not like reading google's "terms of use" for other services as it always  dissapoints me when commercial aspects are not allowed. I have not read fusion tables terms of use in detail. However reading that the Natural Earth datasets are public domain and can be used for any purpose, I detail below the method I used to generate KML by prefecture for Japan.

*My Google Fusion blog for KML http://sap-in-japan.blogspot.com/2011/03/japan-kml-by-prefecture.html

Also to point out if you want online community access to geographic data and maps then the geocommons website is well worth a visit. I found lots of data related to Japan (and prefectures) that could be used, however commercial aspects are restricted.
Geocommons link searching for Japan prefectures.
 http://geocommons.com/search?mh_query=japan+prefectures

So the intention with the blog is to show a way to get KML that can be used for ANY purpose.

KML from the Natural Earth Datasets.

Summary of the software/data used.

*) Natural Earth datasets from the 10m cultural download section
The shapefile used to generate the KML by prefecture of Japan is from the Admin 1 section shown below.

I chose the "Download without large lakes" shapefile. I have not checked whether it actually contains large lakes or not however the name of the download made me select it. The actual name of the shapefile "10m_admin_1_states_provinces_lakes_shp.shp"  and the fact that the download is a larger file than the one without large lakes - does make me doubt the description! However the KML at the end is fine.

*) QGIS
To quote "Quantum GIS (QGIS) is a user friendly Open Source Geographic Information System"

The QGIS software is used to extract the Japan prefectures from the Natural Earth shapefile
Download here http://www.qgis.org/wiki/Download

I have QGIS installed locally on my desktop.

*) Excel or Open Office spreadsheet.
Excel is used to modify the dbf file from the shapefile downloaded from Natural Earth. The data in the shapefile relates to FIPS standard notation where I add the ISO related data from wikipedia for the prefectures of Japan.
I used this link to cross reference the data to the wikipedia page http://www.statoids.com/ujp.html

*) Geoserver
To quote again "GeoServer is an open source software server written in Java that allows users to share and edit geospatial data"

The Geoserver is used to generate the KML from the modified shapefile.
Download here http://geoserver.org/display/GEOS/Download

I have an instance of Geoserver running in the cloud on an free micro instance from Amazon.
Here is my EC2 instance showing the Japan prefectures with openlayers.
As its a test server I may stop it at some point and therefore it will not display.


QGIS Process

First objective is to delete all data that is not related to Japan from the Natural Earth shapefile.
Open QGIS and take the menu options "Layer" -> "Add vector layer".
Select the "10m_admin_1_states_provinces_lakes_shp.shp" file downloaded earlier.


QGIS Query option to select Japan from the ISO code JPN


Attribute table will show the remaing data for Japan (or county of choice).


Save the changes to the shapefile

 
Merged Polygons

While editing the natural earth shapefile I came across a very small  polygon with only 3 vertices in the Shimane prefecture,
As this would not be seen in my use of the KML file I merged the features using QGIS's merge icon. Also I edited the merged data to match that of the Shimane prefecture, as shown below.


Save the project and save the results back to the shapefile. Answer yes to the prompt.


Excel/Open Office Spreadsheet Process

Once the Japan only shapefile has been created then the dbf file needs to be edited. (in this example I add the ISO codes for the prefectures but this step is optional).
Open "10m_admin_1_states_provinces_lakes_shp.dbf" with Excel/Open Office.

I removed all columns apart from the ones shown below. I added the ISOP_1 column for the Japanese ISO prefecture codes.

ISO related data from wikipedia 
FIPS and ISO related data found at http://www.statoids.com/ujp.html

I noted the following while editing the natural earth shapefile data.


Osaka and Nagasaki share the same FIPS code. I changed Nagasaki FIPS to JA27
Okinawa and Tokyo share the same FIPS code. I changed Okinanawa FIPS to JA47

OBJECTIDVERTEXCOUISONAME_0NAME_1REGIONPROVNUMBERISOP_1FIPS_1
1872311.00000000000JPNJapanHiroshimaChugoku11JP-34JA11

*the same procedure for all rows in the file.


Save this file in the SAME dbase format (*.dbf files).
Geoserver Process

Once the shapefile is ready then it needs to be converted into KML.

There is a Geoserver quickstart guide which covers the Natrual Earth datasets.
Follow this guide to import the edited shapefile into Geoserver
http://live.osgeo.org/en/quickstart/geoserver_quickstart.html

However as we only want Japan (or any country of choice) then the bounding box needs to be adapted for Japan only.

As per this screen shot


I found the bounding box data from here http://nobmob.blogspot.com/2011/04/14-open-street-map-2-geoserver.html
Native Bounding Box:
Min X: 122.94
Min Y: 24.322
Max X: 145.82
Max Y: 45.522
Lat/Lon Bounding Box: 
Min X: 122.94
Min Y: 24.322
Max X: 145.82
Max Y: 45.522

Finally Export to KML

Option "Layer Preview"

Export to plain KML


To be continued....

KML file result is here http://bit.ly/japankml

Using the KML file in SAP
Using the KML file in Excel

Google maps can read online KML files , so heres a screen shot of my Geoserver serving up the KML on Google maps.


Here is a screenshot of the KML loaded into Google Earth


Google +